Open a web browser and point to the IP of the PBX install. You had the option of assigning a staic IP or using DHCP. If you chose DHCP and have no clue what the IP address it, log into the free PBX console using the username ROOT and the password you created.
Type IFCONFIG this will give you the IP address of the system.
After you open the interface, you should see a prompt to create a password. This password is used for the web interface only.

Go ahead and log into the interface using the username and password you created in the last step.
You will then see this screen:

System status gives us a brief overview of whats happening right now on the freepbx box.
We are first going to create an extension. To do this, choose applications in the top link bar then choose extensions. You will be prompted with the following:


The secret or password I created was 1000abc
After the extension has been created, you can now configure your x_lite phone. Below are screen shots of that.
After xlite has been installed, add a new account:
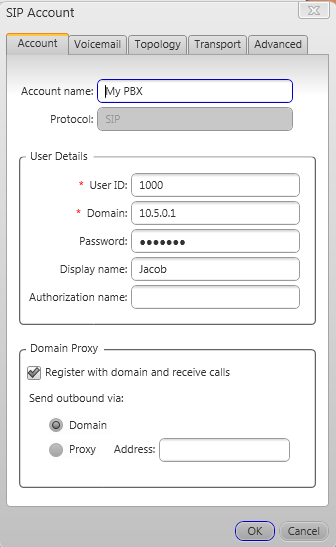
User ID is the extension you created, domain is the IP of the free pbx box, password is the "secret" you created. Display name is what shows up on the internal caller ID.
To test your setup, you can dial *43 to perform an echo test.
No comments:
Post a Comment